full screen background image

Thursday, 3 January 2013

Meet Ms. January!

Jenn Borjeson is our Ms. January and brings her fresh style and flair to Bombshell!

Here's a little interview with her so you can get to know her better!

Brief info about yourself, including your name, where you live, your family (if you want), etc.
My name is Jenn Blakeney Borjeson and I live in Sebastopol, CA. We recently relocated from Massachusetts to Northern California and I am loving it here. I'm 41 years old. I'm married and we have 2 teenagers. Our son Trevor is 19 and our daughter Cassidy is 17.

2. How long have you been stamping and/or crafting?

A little over 10 years

3. What are your favorite Bombshell sets and why?

I love the Sugar Skull sets. I'm drawn to gothic images and the like, and the Sugar Skulls are so versatile. I like that I can color them up to be pretty and dainty, dark and grungy, or anything in between.

4. What kind of projects do you like to do?

I really love to do mixed media projects, but I spend a lot of time making cards. When I can spend a whole day with my hands covered in Gesso, paint, glitter, glue, etc., I am in my glory!

5. What are your favorite coloring mediums?

Prismacolor pencils and mineral spirits, hands-down!

6. Describe your crafting "style".

My style is cute and creepy. I tend to gravitate towards the real sugary sweet cute images and the dark gothic ones, I guess I like contrast. :D

7. Describe your crafting process. Do you start with a stamp set? A sketch? A technique you want to use?

I usually print myself a list once a week or all the things I want to get done that week, including my DT commitments and any challenges I want to enter, sorted by the date they are due. Then I get to work crafting!

8. Do you have any other hobbies?
I enjoy collecting things like beach shells and rocks, angels, and anything with peace signs on it. I love to read -- Stephen King is my favorite author so I'm usually waiting for his next book to come out.

9. Free for all including little facts, etc. about you.

I'm a happy girl, I love to smile and laugh and I love to make other people smile and laugh. I am overweight but I am healthy and my husband makes me feel like the most beautiful girl in the world, so I don't let it stress me out too much. I am a Leo. I believe in ghosts, spirits, and aliens. I love tattoos and currently have four of them, definitely want a few more. I would do anything for the people I care about. I am sorta kinda addicted to the Internet, chocolate, coffee, all-things-pumpkin-flavored, and Middle Eastern food. I hate mushrooms. I just got a Nook and although I like it, it will never replace a big old hardcover book (love the smell of paper...). So this is me! Thanks for having me as the January Pin-Up, I'm so happy to be here!

Here are three of Jenn's favorite Bombshell projects!


Now that you've learned more about our Ms. January AND feasted your eyes on her artwork, go check out her blog for even more inspiration!


Wednesday, 2 January 2013

Happy New Year Diva


Happy New Year or Happy Birthday.  This gorgeous darling does the trick. The card itself is a bit of a trick.  It's a tri-fold card with a clear acrylic layer at the front.


The first layer of the card features the gorgeous diva from Bombshell Stamp's Butterfly Queen set.  She's stunning and makes me yearn for the body I had in my younger years.  The acrylic layer is adhered to one of the cardstock flaps.  To hide the adhesive, I added a border and then another one on the other side for balance.   


In the shot above you can see the layers folded out.   The second layer is created with a stamp from Bombshell Stamp's Pin Stripes set.  It's colored with Copics in an art deco style. 


On the inside I stamped the same pin stripes image using a stamp off technique.   You can just barely see it behind the Butterfly Queen.


And lastly, a shot with the card laying down.  You can see the neat effect of having her on that clear layer in front of the pinstripe/art deco layer.   


Supplies: 
Stamps: Bombshell Stamps (Butterfly Queen and Pin Stripes)
Paper: SU Cardstock, Acetate
Ink: Memento
Coloring: Copics
Tools: Martha Stewart border punch

Tuesday, 1 January 2013

December Hump Day Hop & January Hop Preview

Happy New Year! We are running the December Hump Day Hop a little late. A few folks needed some more time, and we wanted to have as many participants as possible, so we bumped the hop up a few extra days. We want you to enjoy as many fabulous Bombshell projects as possible!

December is typically a month filled with gift-giving. So, that's the theme! "Make it a Gift." I challenged everyone to use any Bombshells they wanted, and to make any gift they chose...but no cards! Here is the full hop list.


And now....for the January Hump Day Hop theme preview! "Baby, it's Cold Outside." Make a winter themed project, use the title of the hop as a sentiment, dress your Bombshell up in warm clothes (or not!), etc. You can sign up for this hop HERE

Now it's time for you to get on with the hop! Please be sure to stop by everyone and show them some love. Have a fantastic New Year's Day!


Friday, 28 December 2012

Pan Pastel background card tutorial

I used for this card:
 Pan pastels and Pan pastel blending tools
Momento Tuxedo black ink
Copic- and Flex markers
Fixative, glue and card stock.
 
Make a Pan pastel background by blending colours.
At the bottom I made a slight wave in it to create water.
Spray it with fixative beefore stamping.

 
Stamp images onto the card and stamp the images again on white paper.

 
I colored my images on the white paper with Copic- and Flex markers,
of course you can use anything you desire to color with.
 
Then you get this. The same I did with the palm trees.
Cut out the coloured images,just cut the fiddly bits of, as the image is already stamped on your card and will show anyway.

I did the same with the palmtrees,then glued them on to the already stamped image and glued the whole picture on a red card.
I also stamped the Aloha text in a matching color,and ready is your card.
 
 
Have a crafty day!
Kind regards, Stempelientje.

Wednesday, 26 December 2012

December's Hump Day Hop -- Postponed!

Greetings! December's Hump Day Hop, "Make it a gift" is postponed til next Tuesday, January 1st, due to holiday craziness, travel, and sickness.

The hop theme is:
December is often a month filled with lots of gift-giving. So...that's our theme! "Make it a Gift!" Use any Bombshells you want, and make any gift item you want...but no cards this month!

The good news is that you can still sign up to hop along with the Bombshell Girls and Pin-ups! The new deadline is Sunday, December 30th! Sign up HERE!

We sure hope you can hop along with us using the new Bombshell Stamps that you got from Santa (and any other Bombshell stamps)!

Monday, 24 December 2012

Christmas ornament tutorial

Needed:
Bombshell stamps,card stock,paper for stamping,colorbox ink,Spica glitter pen,glue,small piece of thin ribbon, square punch.
. 
 Punch out a square, use it as a template  to trace so you can make a cube.
 
  Cut it out and fold the lines.
 
 Stamp Bombshell images for 6 squares.
 
 Punch out 6 squares  and glue the cube together.
Before you glue the last bit of the cube,add a piece of ribbon in a corner.
 
 Add some sparkle to the images and sponge the sides.
 
Glue the images on the cube and your ornament is ready.

 Create your own banner at mybannermaker.com!

Muse Monday- Week 4- Pin Stripes

This month we are show casing the Bombshell Pin-stripes Stamp Set and showing you how versatile this stamp set is!
As it is Christmas Eve I thought I'd show you how decorative the Pin-stripes set can be by embossing it in red onto this Spellbinders Ornament Die.


I used the lovely October Afternoon papers, Spellbinders Heirloom Ornament 2011 Die, Red embossing powder to stamp the pin-stripes and some shiny embellishments!


I hope your preparations are ready for Christmas and you can now chill out!
Wishing you all a Merry Christmas!
GlitteryKatie xXx

In addtion!!!

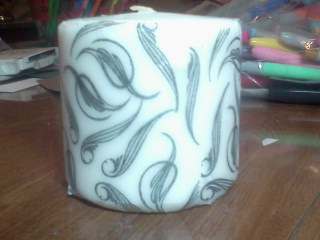
Emilys candle :)

Sunday, 23 December 2012

Christmas Chrome (on cards)


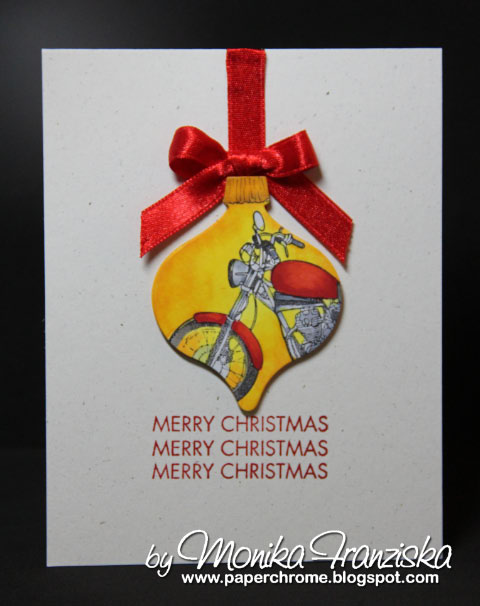
I just had to get these posed before Christmas.   After doing the motorcycle ornament card the other day, I just had to do a remake - CAS version with the ornaments.  I wanted the ornaments to stand out and steal the show. I'm using Bombshell Stamp's Vintage Motorcycle stamp set for these ornaments.


And as I was taking pictures, my little Ebony decided she needed to come in and inspect.  


Supplies: 
Stamps: Bombshell Stamp's (Vintage Motorcycle), Hero Arts (the greeting is cut from a background stamp)
Ink: Memento
Coloring" Copic
Tools: SU dies
Paper: SU Cardstock
Accessorites: Misc Ribbon

Hope you like these cards.
from Ms. December - Monika Franziska, PaperChrome


Mele Kalikimaka!

Hello Ladies (and Gents!)

Sharing a little inspiration today with this cute little card I created using our Hawaiian Girl set. Happy Holidays!


-Rachael

Saturday, 22 December 2012

Motorcycle Ball Ornament - Tutorial

Here's how I made the motorcycle ball ornament for last Wednesday's post - the December Get Ornamental Challenge.   I used the Bombshell Harley Bikes Stamp set for this ornament.  Here's how  I made it.


1. For supplies, you'll need:

  • A glass or plastic ornament
  • Stazon ink
  • A stamp set of your choice - I used  Bombshell Harley Bikes Stamp 
  • A transparency sheet. 
  • Alcohol or solvent markers such as Copics and/or Sharpies
  • Filler for the ornament such as cotton, Styrofoam balls, etc.


2.  Stamp the image using Stazon onto a transparency sheet. 


3.  Flip the transparency over.  This is critical as you don't want to color on the same side you stamped with Stazon.   The alcohol or solvent markers will not mix well with Stazon. 


4. Color on the reverse side of the transparency.   You'll need to do a touch and lift technique as the ink will pool on the transparency and the ink will need to dry.  Also touch up any part of the stamped image with a black Sharpie as the Stazon ink will pool on large solid areas.


5. Cut out the image after it is dry.   Handle carefully.


6. Roll up the cut out image and gently insert it into the ornament.


7.  Use a long slender object to help unroll and position the stamped image inside of the ornament.


8.  Add filler to the ornament.   I used some cotton and glitter, but probably could have skipped the glitter as it ended up sticking to the glass ball itself.


9.  Add some ribbon and you're ready to go.   I add some adhesive strip to the top of the ornament, wrap the ribbon and tie a bow.   Anytime I've just placed ribbon onto a glass ornament with just glue dots, it rarely help up.


Hope you like this Tutorial.
from Ms. December - Monika Franziska, PaperChrome