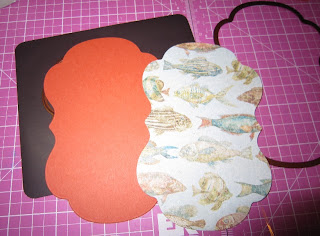
Don't you just love these fantastic shaped wafer thin dies. I know I do. I really enjoy the nesting shapes too, but there are times when I want a smaller shadow or reveal than the different sized nesting shapes offer. Well, that's when it's time to get creative. Here's a technique that works with a lot of these beautiful shapes. Give it a try.
Pick a die that has scallops or points
Cut your foreground layer. I used this fish patterned paper from K&Company.
Cut a second shape out of what you'll use for a shadow layer. I used some Stampin' Up Dusty Durango cardstock to go with some of the burnt orange accents in the fish print.
Now you'll have to shapes the same size.
Take the background layer and cut at the indented scalloped areas. If you're using one with points, cut in at the points. Note that you may have to round off or trim a bit of extra as you go along.
Mount the shadow layer pieces to the top layer with just the amount of reveal/shadow contrast that you want.
Here's what the back of the piece looks like. Notice that I wasn't too tidy on my cuts. You won't see that anyway.
Mount your assembled shape with shadow layer to your project.
Finish off your project. I added the Mermaid from Bombshell's Mermaid Anchor set. And nothing is done without a few accent touches. The mermaid has some blue rhinestones as a necklace, the shape I just cut out has some actual fishing line wrapped around it and two fish dangling from it. The fish are cut out of the patterned paper and covered with glossy accents. Oh and plenty of pop dots are used to mount all of this.
Here's a view from the side. You can see the fish a bit better.
A close up. The mermaid is colored with Copic markers and most items are shaded with dye ink.
And the inside of the card - also shaded and an escaped fish.
And here are a couple more examples of this technique.


That is REALLY cool!!!! Will be trying that!
ReplyDeleteFantastic tutorial! This technique is awesome.
ReplyDelete