

I don't know about you but I NEVER seem to have the right colour ribbon to go with a project- or if the colour is right, it's the wrong shade.
Well now you can make your own custom coloured ribbon by using cream or white Seam Binding and your ink pads or reinkers!
This can get a bit messy so work somewhere that's easy to clean up, or cover your work surface with a plastic bag.
I used my Adirondack Color Wash Sprays :

First dampen your seam binding, this makes it take the colour easier but you can experiment with it dry:

Now lay your Seam Binding out on your work surface (old chopping board for me!) and start to add your colour:

I like to add the colour gradually and build it up, plus I was going for a bluey/green shade so I wanted the colours to mix together for a marbled effect, I added a little blue:

When the ribbon was the colour I wanted I squidged the excess off in a paper towel:

and crumpled it for texture and allowed it to dry -you can blast it with a heat gun to speed up the process.
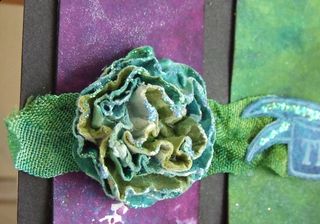
The seam binding has a lovely sheen like silk or rayon ribbon.

This time I used my Color Wash Sprays but I have used my Distress Ink pads, Reinkers and other ink pads- just experiment and see how you go.
This is Tattered Rose Distress Ink:

Seam Binding is available in many craft stores now but if you don't feel like dyeing your own you can buy it in dozens of different colours and you can bye it by the metre, in 5 metre lengths or 25 metre reels.
Just do a Google search and plenty of shops pop up!
Happy crafting everyone!
GlitteryKatie Xxx
brill tutorial ~ think im gonna have to give this a try?
ReplyDeletexXx
Thanks for the tutorial in a way. Fabulous results and gorgeous seam binding rose.
ReplyDeleteNot thrilled that due to you and Mr. Holtz, I now seem to *need* Distress Stain.
Great idea! Thanks and Hugs Marilou
ReplyDeleteGreat ideas!
ReplyDeleteRenee, Simon Says Stamp
I have been thinking about trying this but wasn't sure. Guess I will be giving it a go now. Thanks for the tutorial.
ReplyDeleteFantastic tutorial and love the final results!!!
ReplyDelete